We've done a lot around our place since the last time we posted a DIY project. We even changed places to do a lot around. In the coming weeks I'll be sharing the projects we've finished so far.
Over a year-and-a-half ago we moved from our first Florida home into our second. We had always kept an open mind about finding a house that fit us more, we just hadn't found the right place. After a couple years of casually browsing Zillow and a few months actively searching, we found what we were looking for. In fact, this house is what pushed us into actively searching.
The top items on our list? A house with a pool and one that had some high priced projects done but allowed for a bit of updating. At just over 10 years old, this house offered what we were looking for. The entrance to the home needed to be more inviting as well. Our last house was just kind of awkward. You'd walk directly into the formal dining room with basically no entry. I'll post sometime on how we tried to solve that problem.
The first big project we embarked on was a bit aggressive. But, of course, at the time it seemed manageable. Even with Steph being 9 months pregnant with Penny.
When you walk in it's pretty open and the entry and the family room both have two-story ceilings. There's a wall with a landing on top that separates the two areas but it was... dated. We're not fans of the wall alcoves that are as rampant in Florida as the alligators. Also, mustard and chocolate don't go well together in a food dish OR in paint color.

We knew what we wanted to do with this wall from our first showing. It was something we wanted to do with a wall in our last home—and that's shaker panel. So, right before Penny was born we decided to tackle this project in Dec/Jan of 2015. Penny didn't wait for us to finish.
The first task was to get rid of the alcove and cover up any of the "elegance" of this wall. Notice on the outside of the arches, there's a little embellishment at the top. Instead of knocking that out we had to add an addition under it so that the arch remained level on both sides.

As you can see, the alcoves wrapped around the wall to the other side. It all needed to be closed up. We patched up those parts with sheetrock to make it a flat wall.
Next was the hardboard. We used 3/16, 4x8 sheets of hardboard to cover the entire wall. I had to move the ac vent as well so that it wouldn't interfere with any trim boards.
After the hardboard came the trim around the arches. 1x6 boards for around the arches and 1x4 boards for the paneling. It's important to put the bottom board on a few inches above the ground (aligning the bottom of the board a quarter inch or less below the height of the baseboards) so that the baseboards can sit on top of that. I put a 1x4 behind the baseboard to give it something to nail into.
The arches were the most time-consuming and difficult part of this project. Kind of complicated but hopefully this makes sense.
First, since we planned on trimming the inside of the arches, I used 1x3 PVC boards for the inside top of the arches. You can see them in the picture above. PVC boards are more flexible than wood. But, still not flexible enough for these pretty tight curves. I found out the hard way when my first attempt snapped the board into multiple pieces and smashed a couple fingers in the process.
So, the key was to set my sliding miter saw at a depth to cut about 2/3-3/4 through the 1x3. I then "scored" the board every inch or so along the width. It required dozens of little slices but it took the boards to a whole new level of flexibility. It's like the different between me and Steph doing yoga. Actually, my flexibility is more like the wood but that's beside the point.
Once the board was scored it was easy to position it. Note: don't shoot nails through the score. It'll snap the boards. I also found that out the hard way. Shoot nails through the un-scored part of the board.
It was important to get the inside of the arches in place before the doing the tops of the arches because you have to use the inside measurement to cut the top piece. I used a rectangular piece of 3/4" mdf roughly the size of the arch. I nailed it to the wall using finish nails and traced around the 1x3 that I had just added to get the curve of the arch. I jigsawed along that line. To get the matching curve around the top I used a combo square and slid it along the first curve with a pencil at 5.5 inches on the ruler. Then, I made the second cut to complete the arch.
I also used PVC board for the cross pieces on the inside top of the arch and scored those along the length of the board to get some bend from them.
I used a biscuit joiner for all my joints. Pocket holes would have been too time consuming. If you don't do something for tight joints you'll have boards popping up all over the place. You don't want teenage, pubescent panels because once they're up, no amount of acne wash or growing up is getting rid of those things.
After adding crown molding it was time to paint everything but that would have to wait. The above picture was taken on the night of January 18. Penny came the morning of the January 20, 2015. So, construction was done but painting waited until the end of March.
After a couple months with that little angel, we went with classic white satin (straight from the can) and semi-gloss on the baseboards and it turned out great. See the before and after.


Now the question is, do we hang something on the wall or just leave it blank? Thoughts?
Over a year-and-a-half ago we moved from our first Florida home into our second. We had always kept an open mind about finding a house that fit us more, we just hadn't found the right place. After a couple years of casually browsing Zillow and a few months actively searching, we found what we were looking for. In fact, this house is what pushed us into actively searching.
The top items on our list? A house with a pool and one that had some high priced projects done but allowed for a bit of updating. At just over 10 years old, this house offered what we were looking for. The entrance to the home needed to be more inviting as well. Our last house was just kind of awkward. You'd walk directly into the formal dining room with basically no entry. I'll post sometime on how we tried to solve that problem.
The first big project we embarked on was a bit aggressive. But, of course, at the time it seemed manageable. Even with Steph being 9 months pregnant with Penny.
When you walk in it's pretty open and the entry and the family room both have two-story ceilings. There's a wall with a landing on top that separates the two areas but it was... dated. We're not fans of the wall alcoves that are as rampant in Florida as the alligators. Also, mustard and chocolate don't go well together in a food dish OR in paint color.

We knew what we wanted to do with this wall from our first showing. It was something we wanted to do with a wall in our last home—and that's shaker panel. So, right before Penny was born we decided to tackle this project in Dec/Jan of 2015. Penny didn't wait for us to finish.
The first task was to get rid of the alcove and cover up any of the "elegance" of this wall. Notice on the outside of the arches, there's a little embellishment at the top. Instead of knocking that out we had to add an addition under it so that the arch remained level on both sides.

 |
| The 2x4 frame to the far left had to be added instead of just knocking out the notch that sits above it. Removing that notch would have made the arch crooked. |
As you can see, the alcoves wrapped around the wall to the other side. It all needed to be closed up. We patched up those parts with sheetrock to make it a flat wall.
Next was the hardboard. We used 3/16, 4x8 sheets of hardboard to cover the entire wall. I had to move the ac vent as well so that it wouldn't interfere with any trim boards.
 |
| Are those gray walls in the background? We painted most of the house during the same time. What were we thinking? I think Steph and I were both nesting. |
 |
| 9 months pregnant and gettin' things done! |
After the hardboard came the trim around the arches. 1x6 boards for around the arches and 1x4 boards for the paneling. It's important to put the bottom board on a few inches above the ground (aligning the bottom of the board a quarter inch or less below the height of the baseboards) so that the baseboards can sit on top of that. I put a 1x4 behind the baseboard to give it something to nail into.
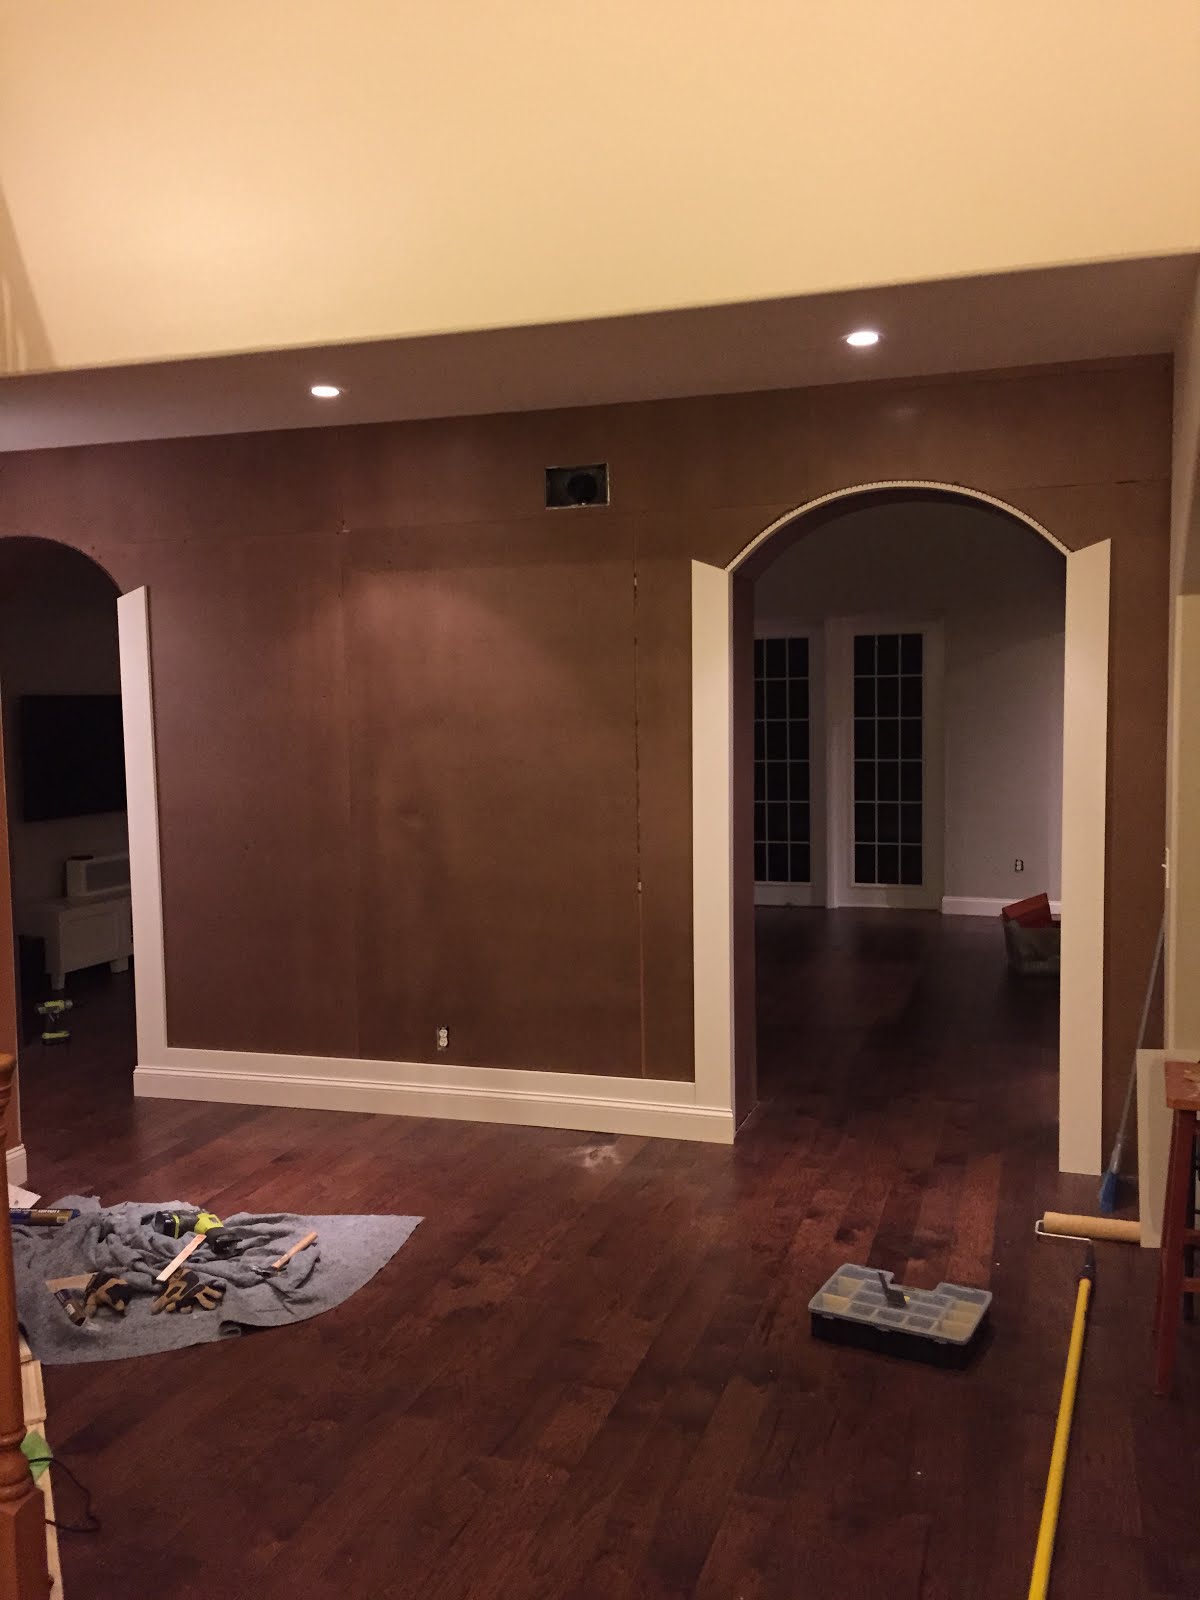 |
| Baseboard and bottom board overlap about a quarter inch. |
The arches were the most time-consuming and difficult part of this project. Kind of complicated but hopefully this makes sense.
First, since we planned on trimming the inside of the arches, I used 1x3 PVC boards for the inside top of the arches. You can see them in the picture above. PVC boards are more flexible than wood. But, still not flexible enough for these pretty tight curves. I found out the hard way when my first attempt snapped the board into multiple pieces and smashed a couple fingers in the process.
So, the key was to set my sliding miter saw at a depth to cut about 2/3-3/4 through the 1x3. I then "scored" the board every inch or so along the width. It required dozens of little slices but it took the boards to a whole new level of flexibility. It's like the different between me and Steph doing yoga. Actually, my flexibility is more like the wood but that's beside the point.
Once the board was scored it was easy to position it. Note: don't shoot nails through the score. It'll snap the boards. I also found that out the hard way. Shoot nails through the un-scored part of the board.
It was important to get the inside of the arches in place before the doing the tops of the arches because you have to use the inside measurement to cut the top piece. I used a rectangular piece of 3/4" mdf roughly the size of the arch. I nailed it to the wall using finish nails and traced around the 1x3 that I had just added to get the curve of the arch. I jigsawed along that line. To get the matching curve around the top I used a combo square and slid it along the first curve with a pencil at 5.5 inches on the ruler. Then, I made the second cut to complete the arch.
I also used PVC board for the cross pieces on the inside top of the arch and scored those along the length of the board to get some bend from them.
 |
| The thing that makes this whole process work is to diagram it beforehand. Seriously, do all the math to scale before starting. If I hadn't, I wouldn't have noticed that the arches were different widths that needed some serious calculations to figure out. My basic math skills were really put to the ultimate test. |
I used a biscuit joiner for all my joints. Pocket holes would have been too time consuming. If you don't do something for tight joints you'll have boards popping up all over the place. You don't want teenage, pubescent panels because once they're up, no amount of acne wash or growing up is getting rid of those things.
After adding crown molding it was time to paint everything but that would have to wait. The above picture was taken on the night of January 18. Penny came the morning of the January 20, 2015. So, construction was done but painting waited until the end of March.
 |
| We were more than willing to wait. |
After a couple months with that little angel, we went with classic white satin (straight from the can) and semi-gloss on the baseboards and it turned out great. See the before and after.
 |
| Before, during our first showing. |
 |
| After |
 |
| Back of the wall. |


Now the question is, do we hang something on the wall or just leave it blank? Thoughts?


